
DIY Paper Flower Bouquet | Easy Paper Flower Craft for Everyone
Step 5: Make the Stem
Take a wooden skewer or sturdy paper straw and cover it with a narrow strip of green paper.
Apply a small amount of glue to secure the paper around the stem.
If you prefer a completely paper-based craft, roll green paper tightly into a tube and glue the edge in place.
Step 6: Attach the Flower to the Stem
Apply glue to the back of the flower and attach it to the top of the stem.
Hold it gently until it stays in place. If necessary, cut a small green paper circle and glue it over the connection at the back to make the flower more secure.
Let the flower dry before handling it.
Step 7: Make Green Paper Leaves
Draw two or three leaf shapes on green paper and cut them out.
Fold each leaf lightly down the middle to create a central vein. You can also draw small lines with a darker green marker.
Glue the leaves to the stem, arranging them at different heights for a natural look.
Step 8: Repeat to Create a Bouquet
Repeat the process to make several flowers in different colors and sizes.
Try making five, seven, or even twelve flowers for a fuller arrangement.
Varying the flower heights gives your bouquet a more interesting shape and helps each flower stand out.
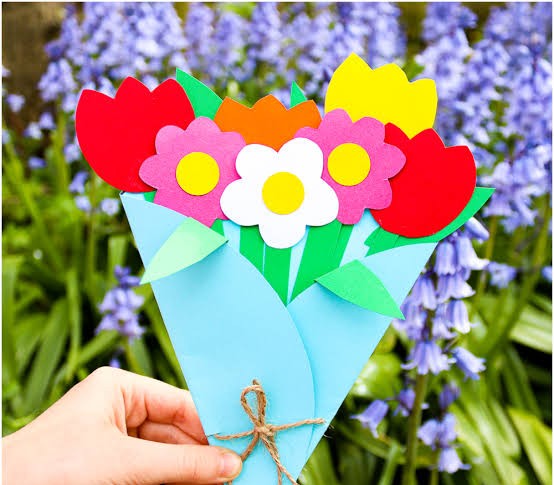
Step 9: Arrange and Wrap Your Bouquet
Gather the finished flowers and arrange them so the tallest flowers sit toward the back and the shorter flowers appear toward the front.
Secure the stems together with ribbon or a paper strip.
For a gift-ready finish, wrap the stems in decorative paper and tie everything with a bow.
Your DIY paper flower bouquet is ready to display or give to someone special!